Introduction
This guide explains how to mount Cloud Object Storage (COS) onto Linux virtual compute instances using Goofys. It covers preparing a COS bucket, configuring access keys, creating a mount folder, and running Goofys to connect. With these steps, users can seamlessly integrate COS as a local file system for easier data access and management.
Reference documents
goofys Github
Linux Tutorial and Examples on Mounting S3 Storage Space using Goofys
System Description
- Cloud platform: TWCC
- OS type: Ubuntu
- OS version: 20.04
Prerequisites: Create COS Bucket
-
Log in to TWCC

-
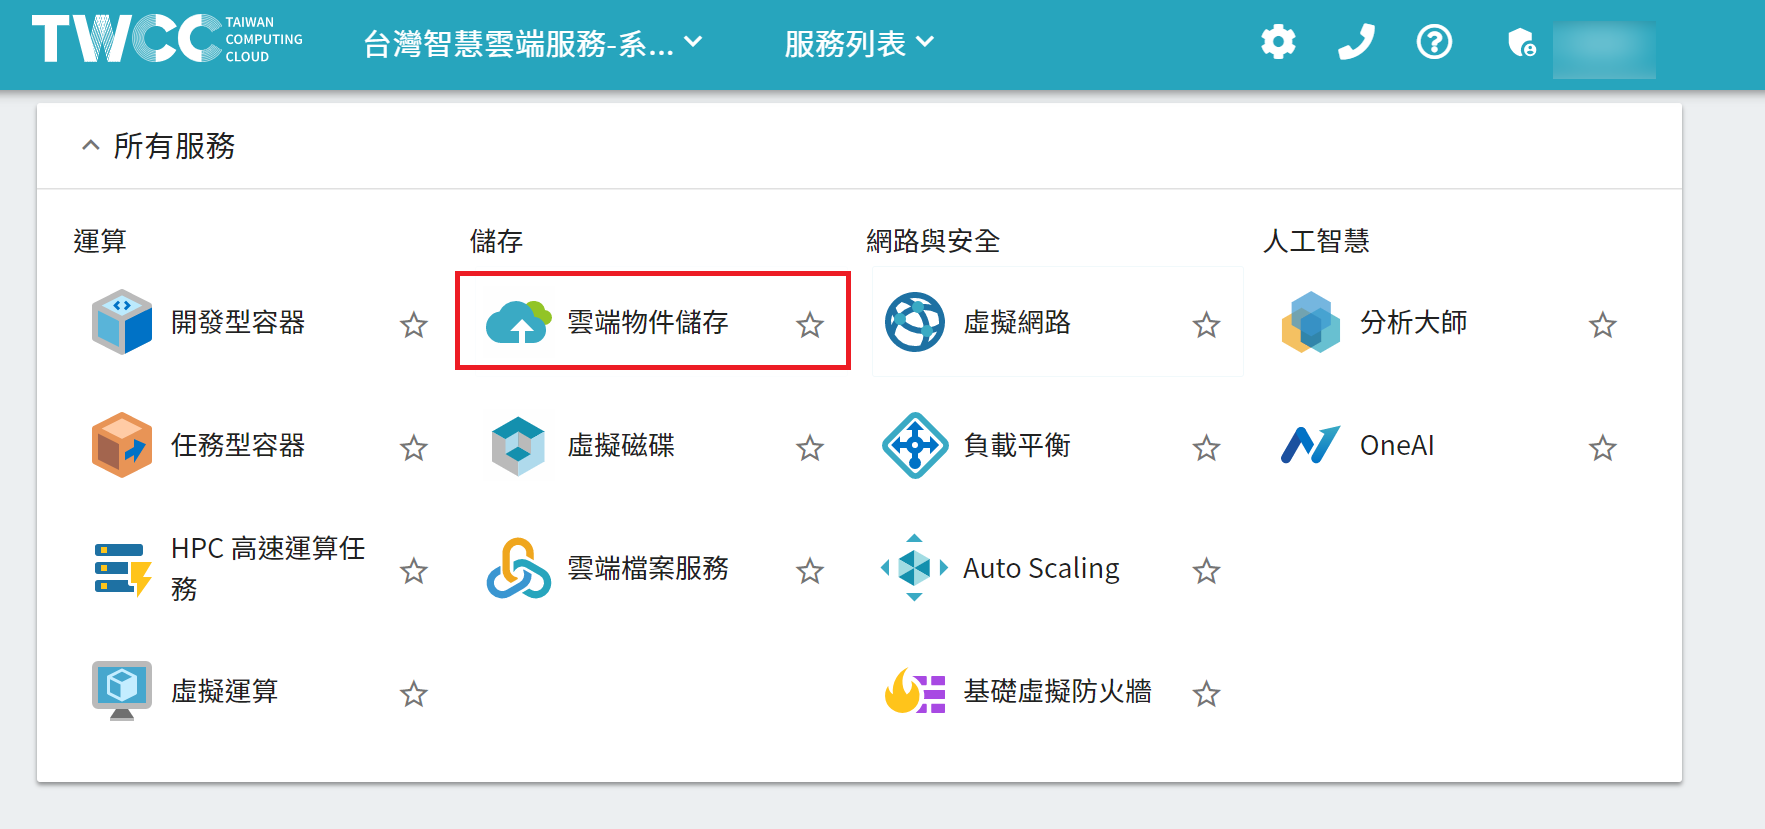
Select Cloud Object Storage
-
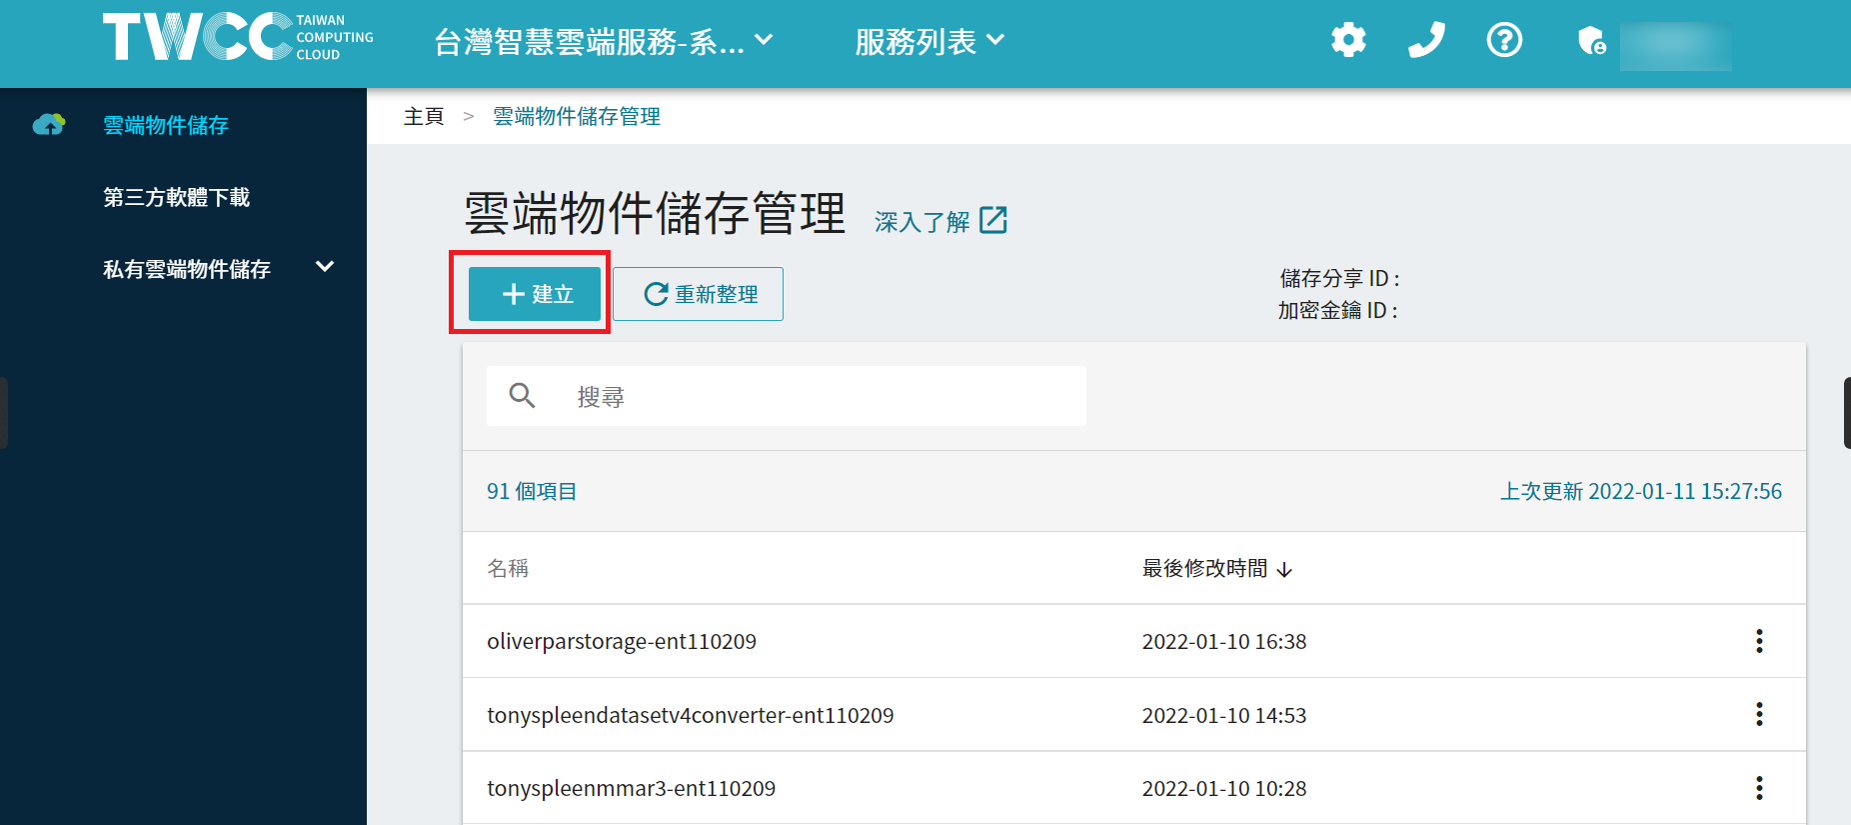
Select [+Create] and enter the bucket name.
Bucket names must be unique!
-
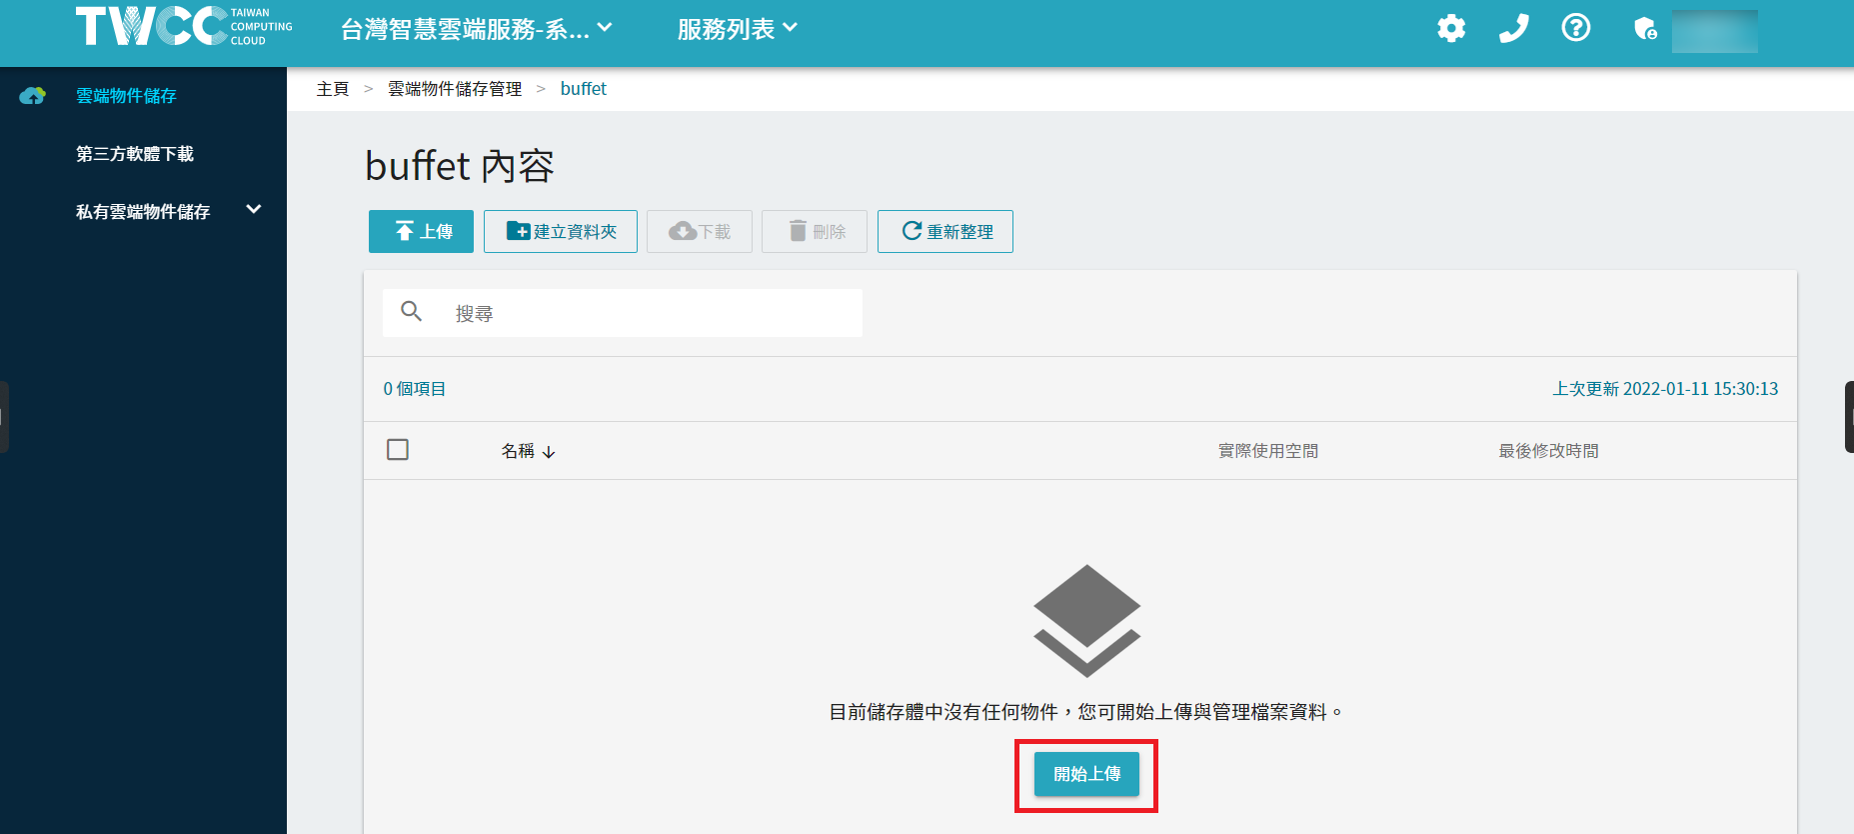
Upload any file to test
Process Overview
- Download goofys
- Set permissions
- Set the key
- Create a mounted folder
- Verify test
- Unmount S3 Bucket
Demonstration
1. Download goofys
wget https://github.com/kahing/goofys/releases/latest/download/goofys
2. Set permissions
chmod +x goofys
3. Configure Keys
Create the ~/.aws directory
mkdir ~/.aws
Create the ~/.aws/credentials configuration file
vim ~/.aws/credentials
[default] aws_access_key_id = AKID1234567890 aws_secret_access_key = MY-SECRET-KEY [twcc_cos] aws_access_key_id = AKID1234567890 aws_secret_access_key = MY-SECRET-KEY
[default]
aws_access_key_id = <access key>
aws_secret_access_key = <secret key>
[<Key Name>]
aws_access_key_id = <access key>
aws_secret_access_key = <secret key>
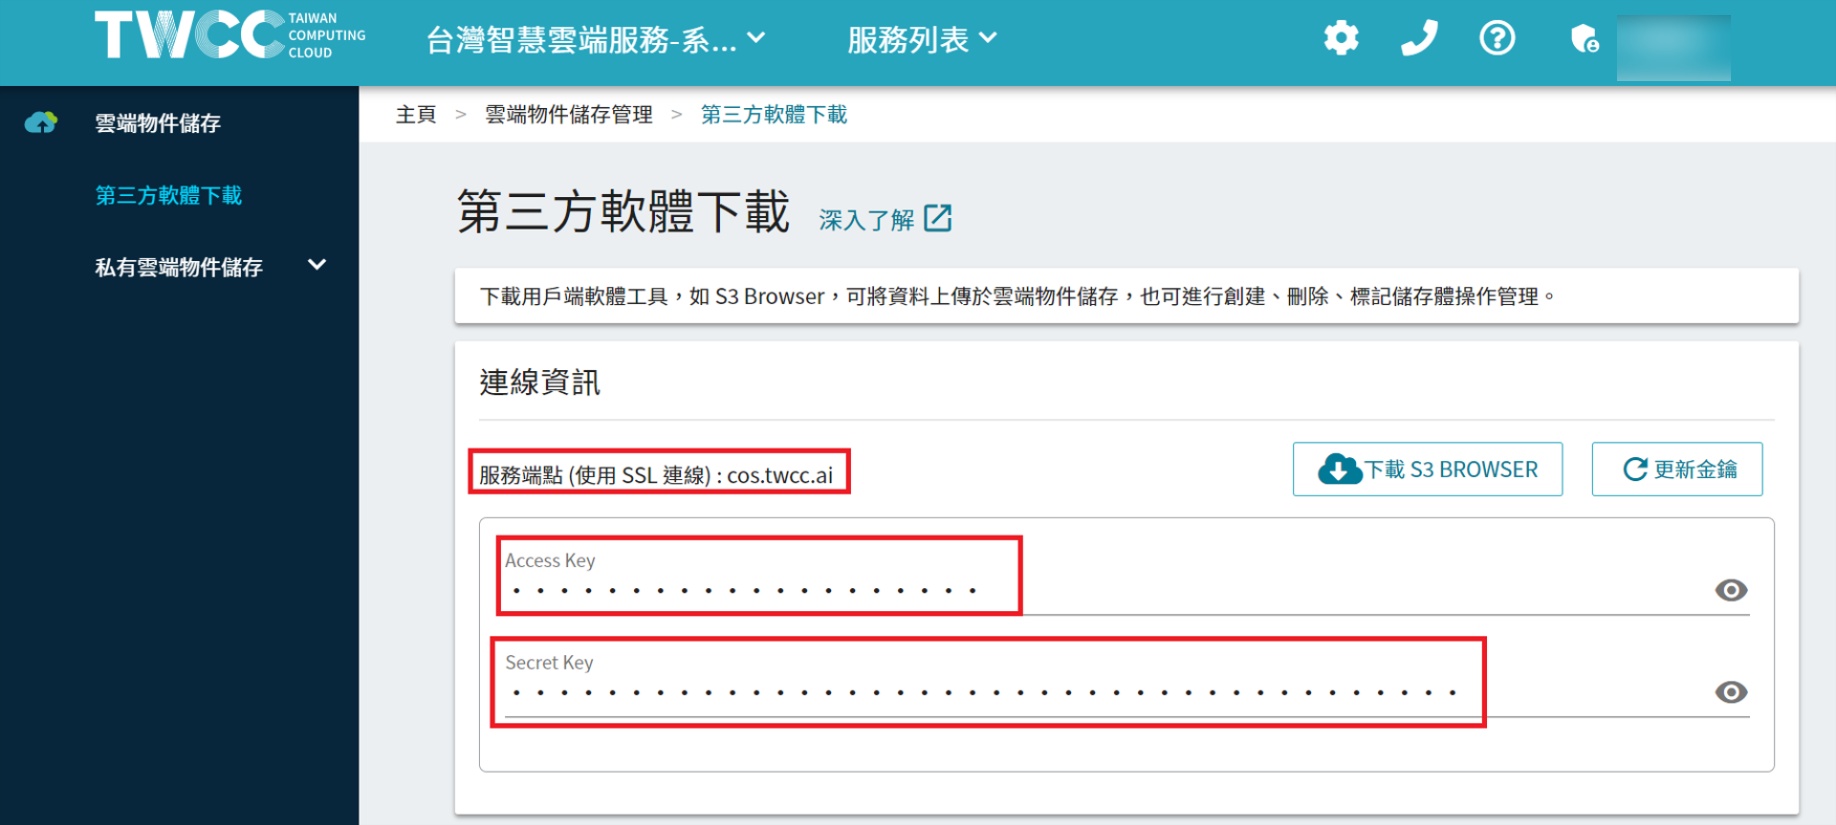
View page for gold keys and nodes
Log in to TWCC homepage => Cloud Item Storage => Third-Party Software Download
Click the eye icon and copy.
4. Create a mounted folder
mkdir cos_folder
5. Use goofys for mounting
./goofys --profile twcc_cos --endpoint https://cos.twcc.ai buffet cos_folder/
./goofys --profile <key name> --endpoint https://cos.twcc.ai <Mount Folder>/
./goofys –endpoint https://cos.twcc.ai <Mount Folder>/
Without the `--profile` parameter, it reads the default key.
6. Unmount S3 Bucket
/usr/bin/fusermount -u mount_pointImage source: pexels