
Windows Server is a Virtual Compute Service (VCS) instance currently provided on the TWCC platform for the Windows series, mainly accessed via RDP. For security reasons, TWCC applies port control on all virtual compute instances. If users wish to modify the default configuration, they can refer to this article to change the connection port.
Introduction
To enhance information security management, unlike most Windows virtual machines that use port 3389, the TWCC Windows Server VCS instances use port 9833 by default. Some users, due to habits or specific requirements, may need to change the port to a designated number for connection. This article explains how to modify the connection port to meet such needs.
Prerequisites
TWCC Windows Server 2019
Notes
- After confirming a successful connection, it is recommended to delete the original security group rule for port 9833.
- When configuring the security group, only open the required ports and rules to avoid potential security issues.
- Please manage your security group settings properly.
Procedure
This example demonstrates changing the connection port to 9834.
1. Configure the Security Group
Go to the Security Group page to configure port settings (Path: TWCC User Interface → Virtual Compute Service → Networking & Security → Security Group). Select the virtual instance you wish to configure.
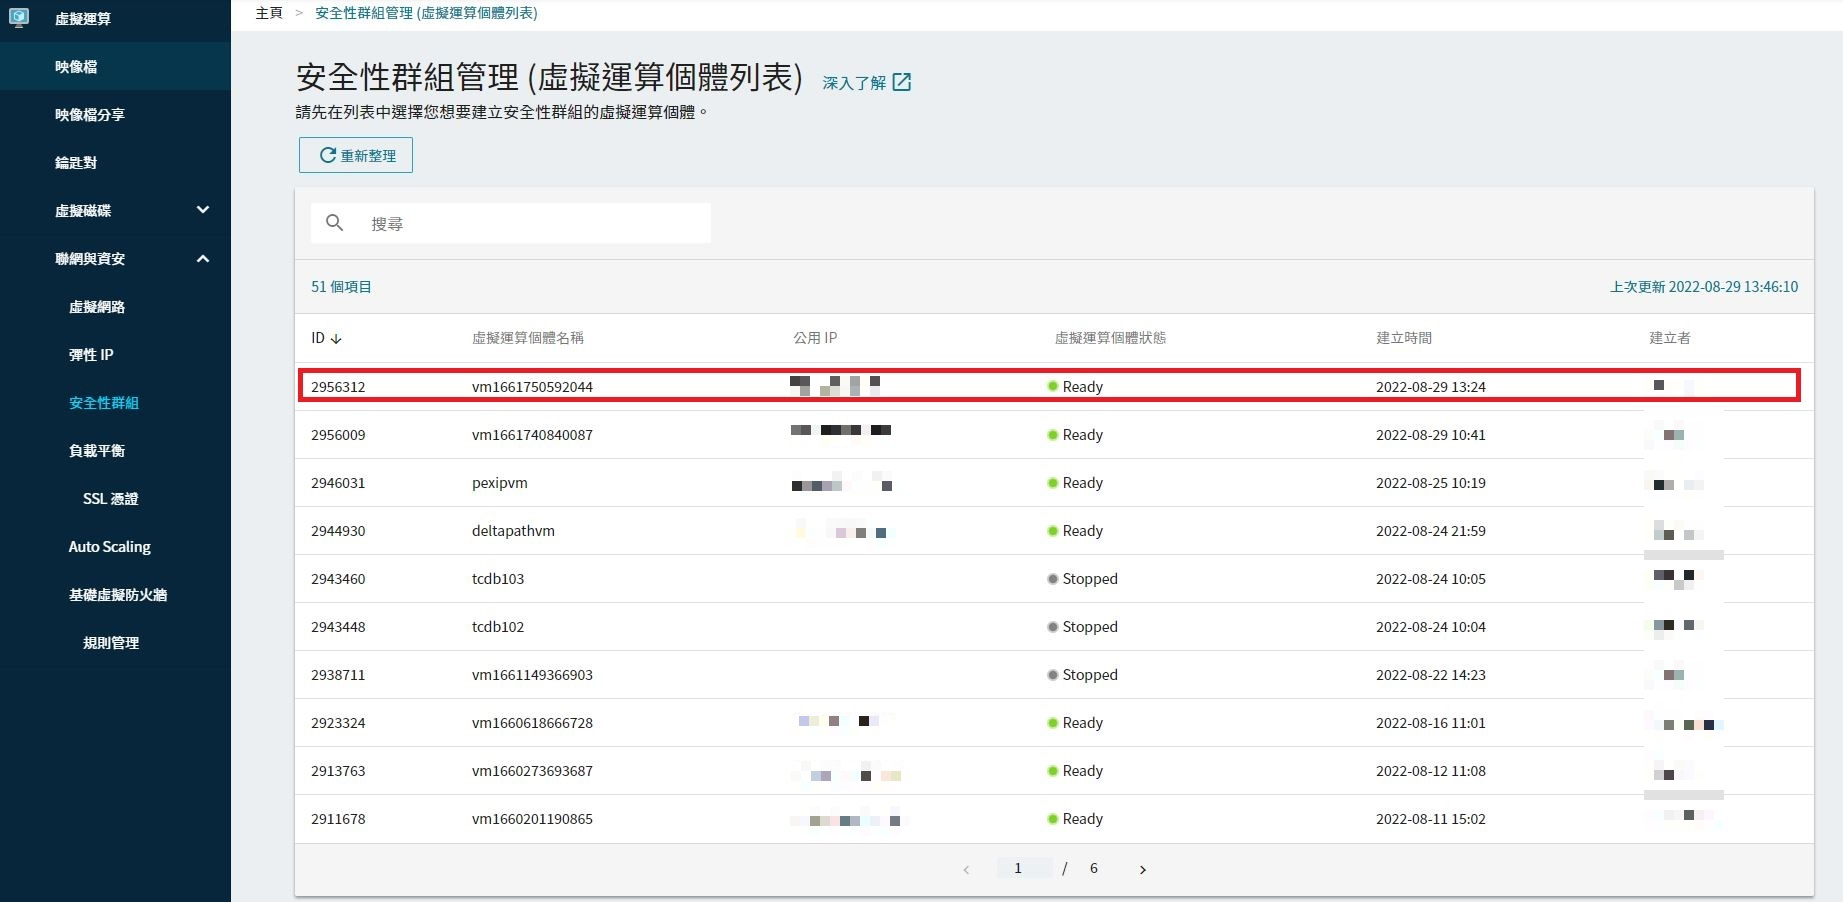
For detailed settings, please refer to the documentSecurity Groups
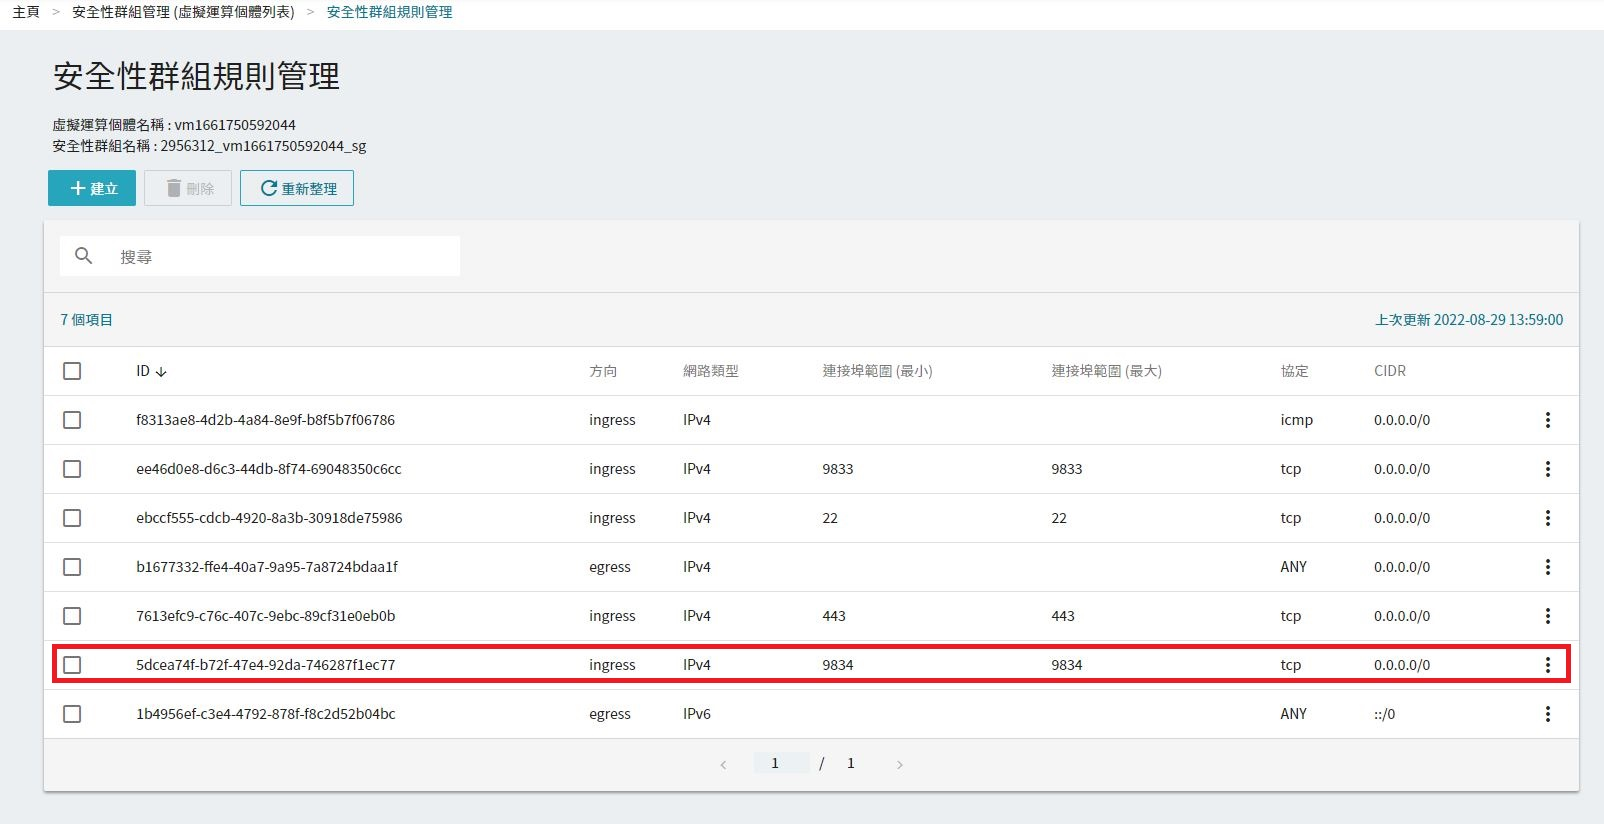
Recommended security group rule settings:
- Direction: Ingress
- Minimum port range: 9834
- Port range (maximum): 9834
- Protocol: TCP
- CIDR: 0.0.0.0/0
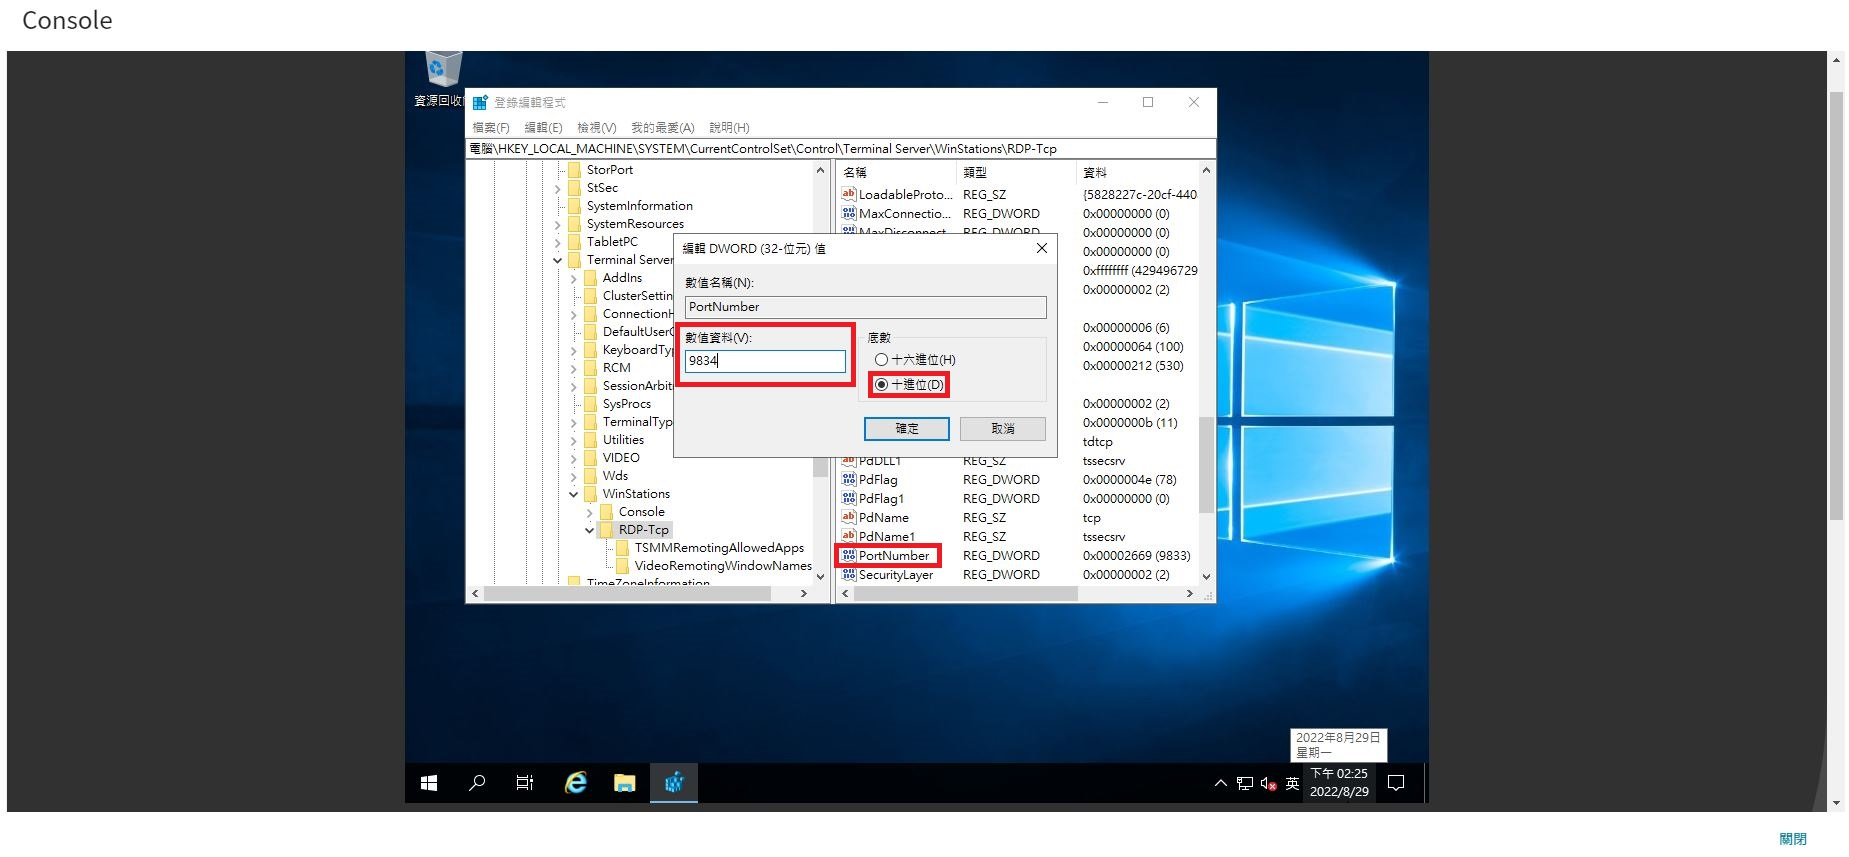
2. Modify Regedit
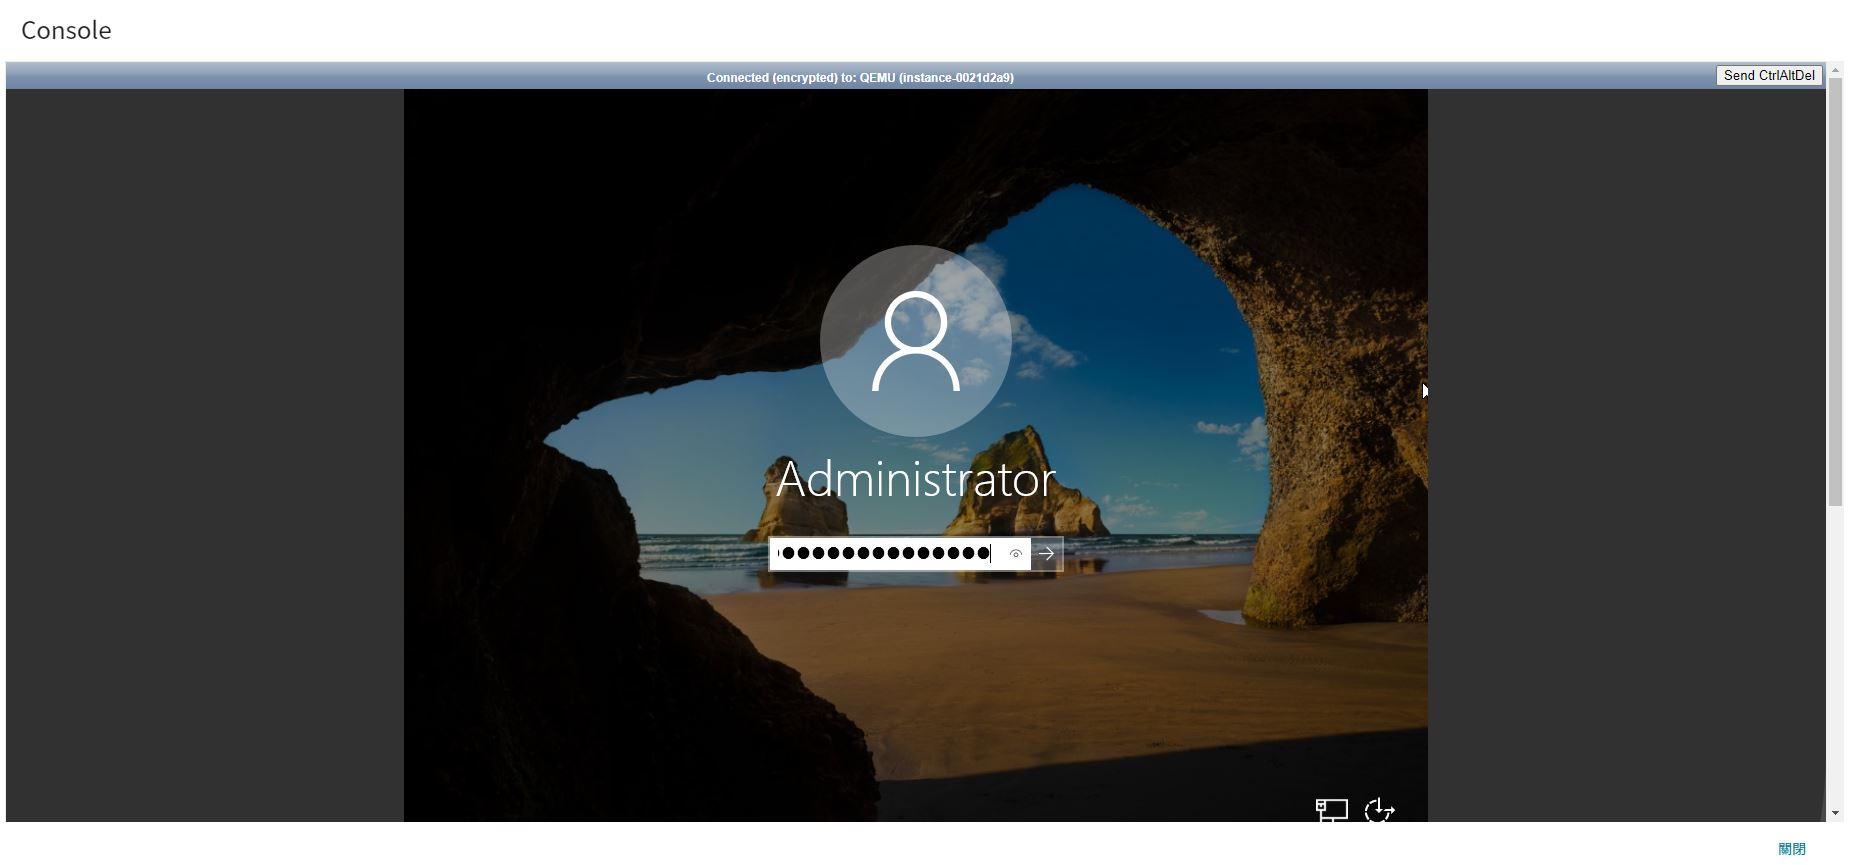
Access the target virtual instance’s detail page and log in using the Console connection to perform operations.

You can refer to Console Connection for detailed instructions.
After logging in, type "regedit" in the search bar to launch the Registry Editor.
In the Registry Editor, navigate to the following path: in sequence: HKEY_LOCAL_MACHINE\System\CurrentControlSet\Control\TerminalServer\WinStations\RDP-Tcp\PortNumber
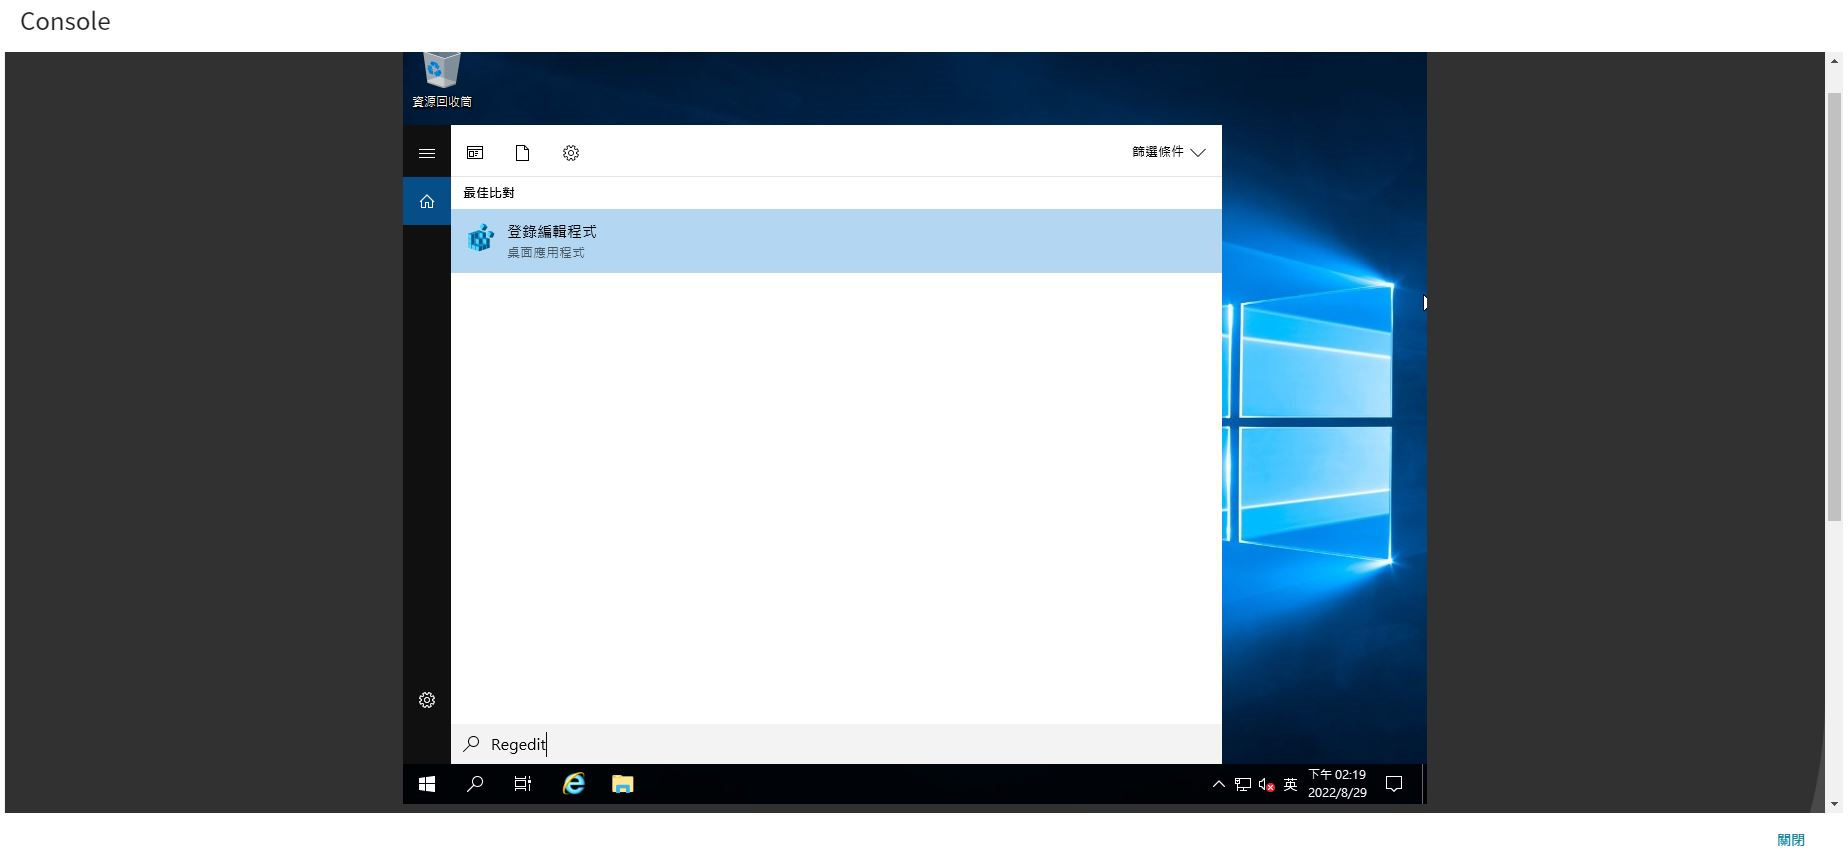
Select PortNumber, choose decimal as the base, modify the value data to 9834 (set the port number to log in), and then press OK.
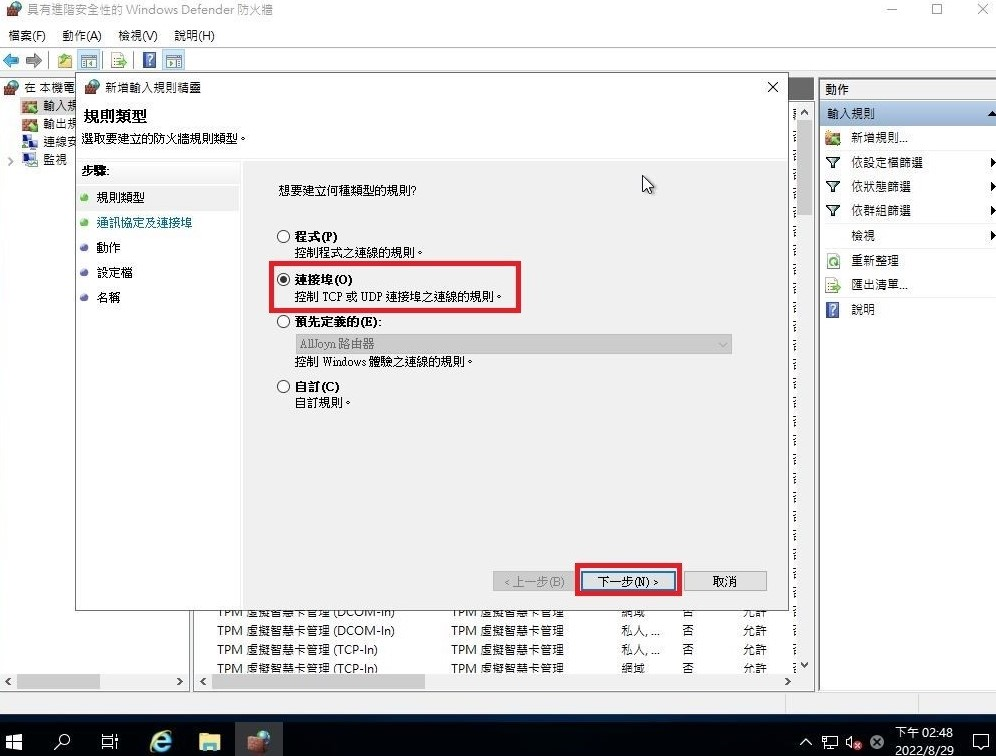
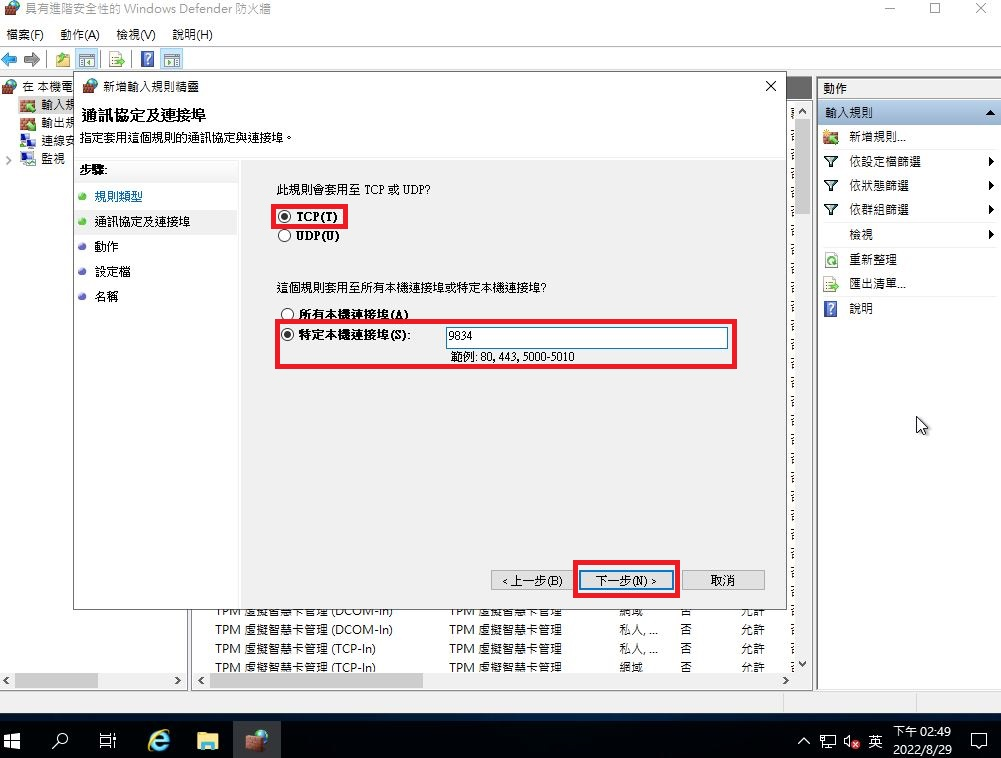
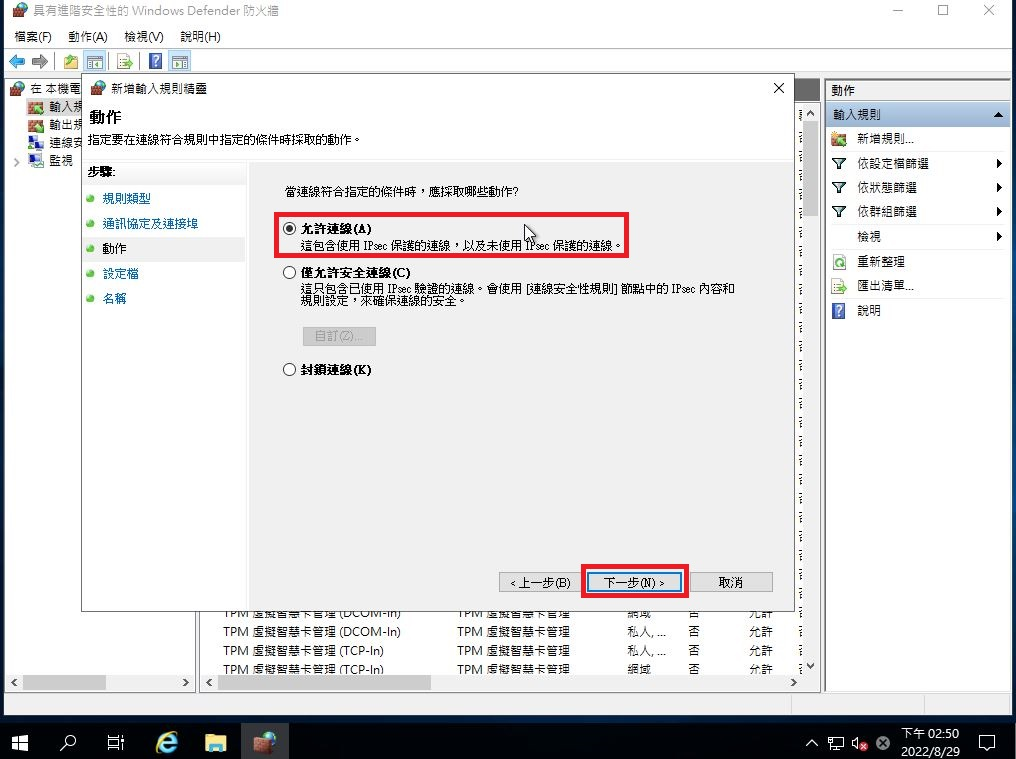
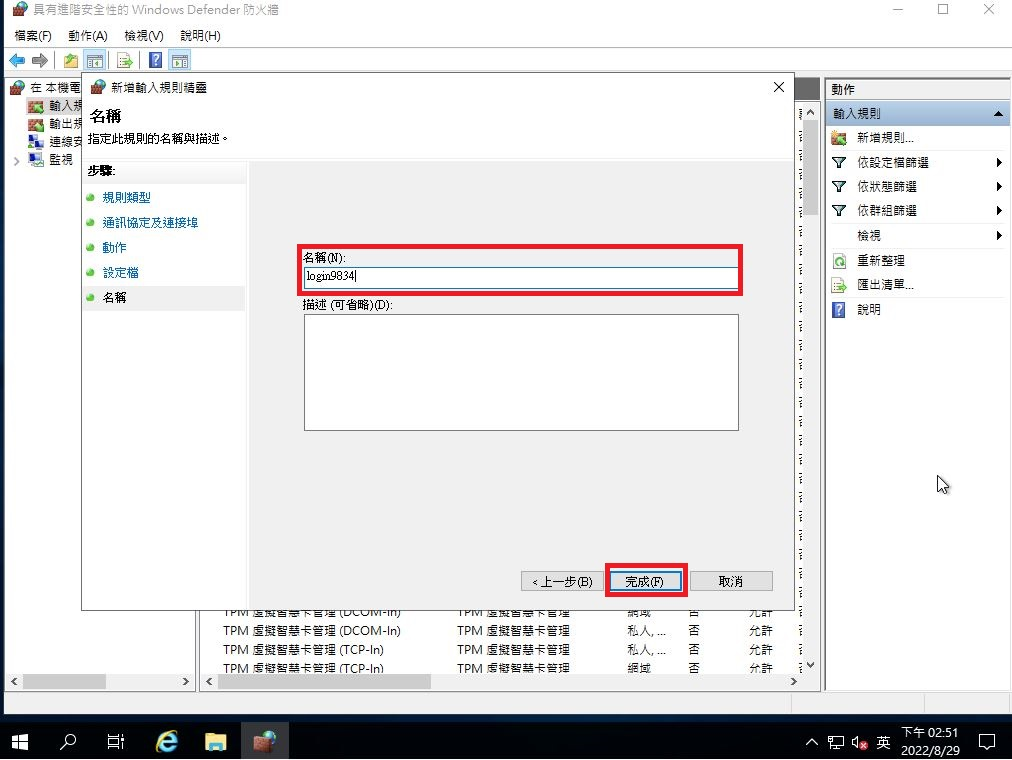
3. Configure Windows Server 2019 Firewall
Type WF.msc in the Windows Server 2019 search box to open the Windows Defender Firewall with Advanced Security settings.
- Select Port as the rule type.
- Set the protocol and port
- Configure permissions
- Set the rule configuration

- Rule name settings: This section can be customized according to individual needs.
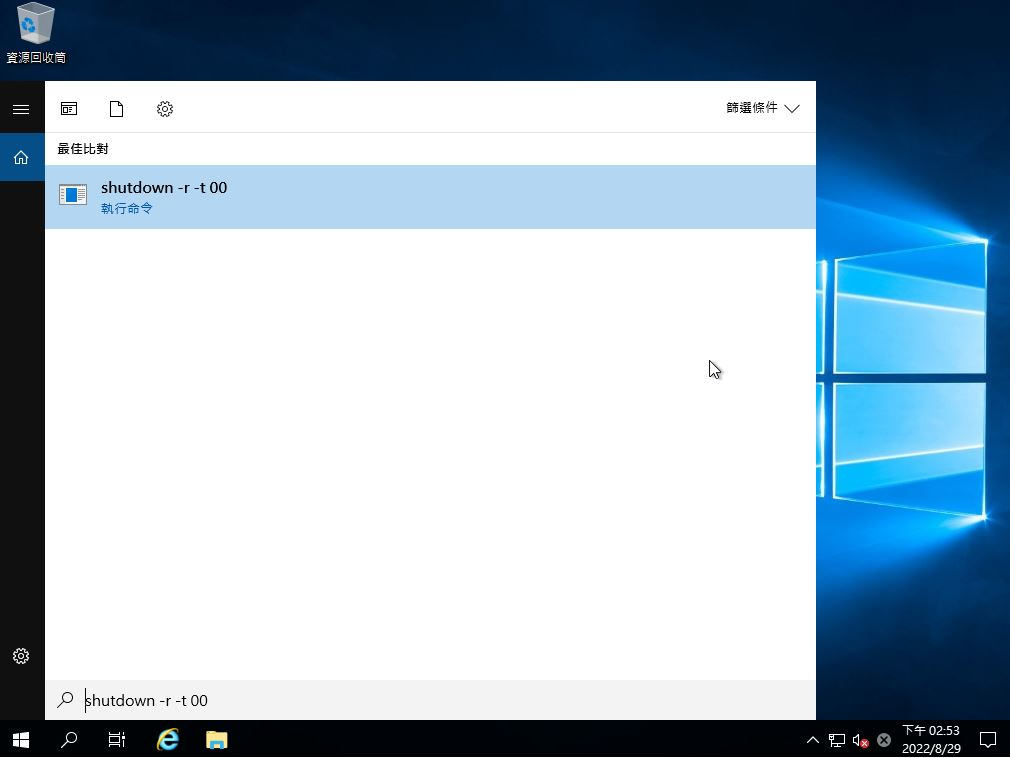
4. Restart Windows Server 2019
Please type `shutdown -r -t 00` in the blank search field to restart the virtual computing instance, and press Enter.
5. Perform port connection tests
- Connect via remote desktop, port number 9834
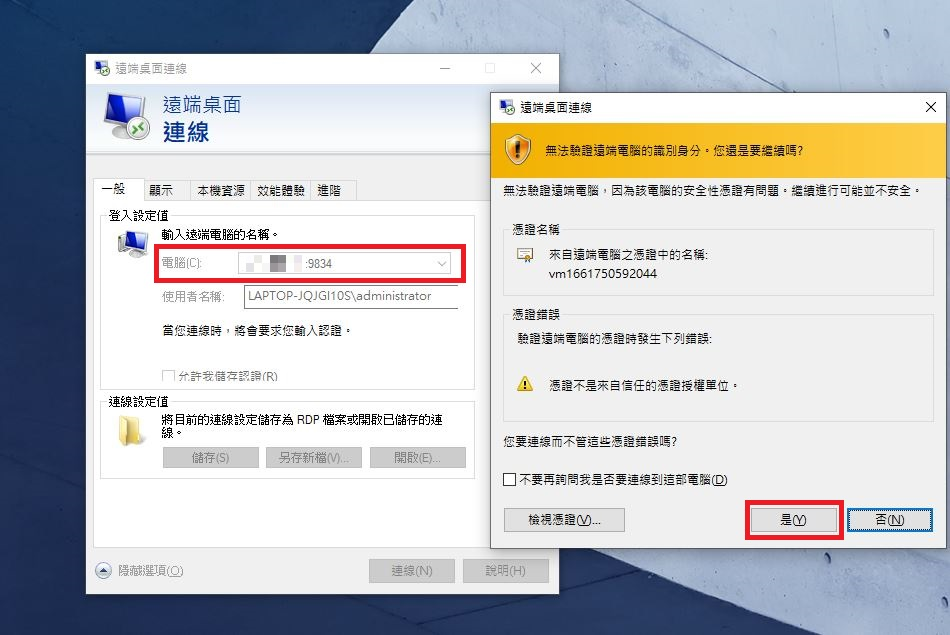
- Connected successfully